Apple Mail is the mail client of choice for many Apple Mac users but configuring it to work with a Hosting UK mail account can be a bit tricky to set up with its default options, as Apple Mail tries to help, but in this case gets a few things wrong.
This article covers setting up Mail with a new Smartermail account although this article is also similar for other IMAP mail accounts.
In this example we're going to set up a mail account mailbox for a user we created earlier called phil@mytestmaildomain.co.uk that has been created on the mail server mail5.hostinguk.net
You should check with your account administrator (the person who looks after your mail accounts) for your details. You'll need at the very least your email address, password and the incoming and outgoing mail server.
NB: If you have signed up for a standard Mail account and have not yet set up your email accounts and you are the mail account administrator and you have not yet created the mailbox you want to set up, you may
need to follow this article first
https://support.hostinguk.net/en/knowledgebase/article/creating-a-mailbox-in-standard-mail
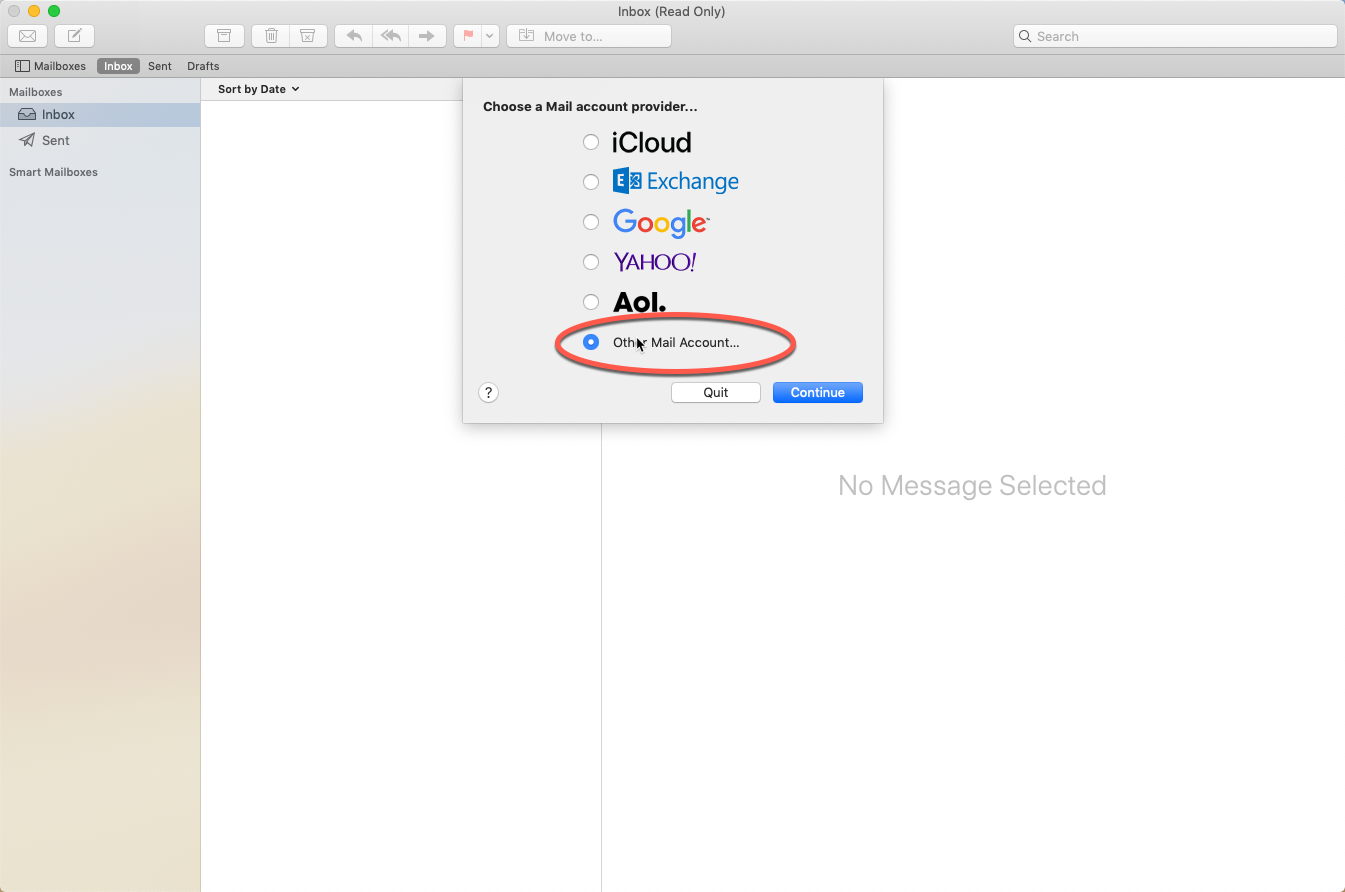
Step 1:First, start Mail. if you do not have an account in Mail, you'll be prompted to select a mail account provider. In this case, click "Other" as shown in the picture below.
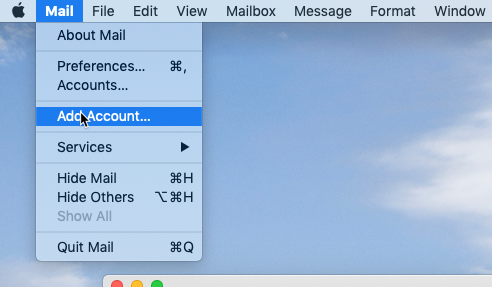
If you already have mail accounts in Mail, Click the Mail option and then Add Account as shown below - if not move ahead to Step 2
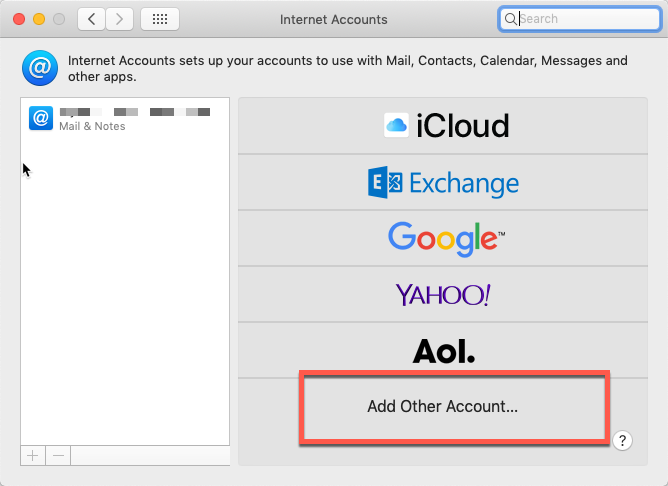
And then click "Add Other Account" as shown below:
 Step 2:
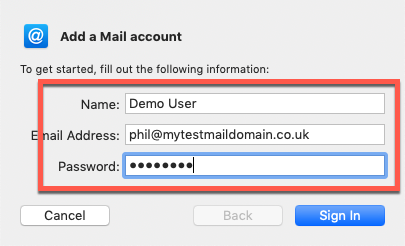
You'll now be prompted to add an account. Enter the users name, email address and password in in the boxes as shown below
 Step 3:
Mail will first try to automatically find the settings but as it won't be able to you'll see the box below.
Fill in the details in the empty boxes shown.
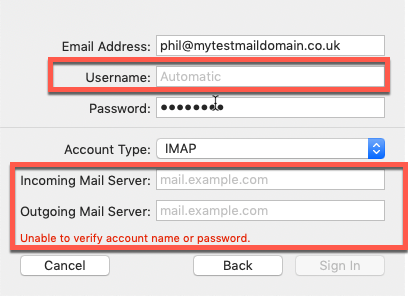
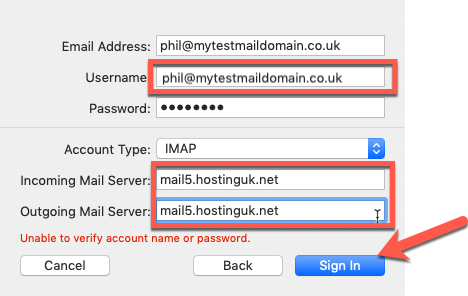
The username will be the email address you are setting up. The incoming and outgoing mail servers should also be entered.
Step 4:As you can see below we have now entered these, so once you have done so, click the Sign In button.
 Step 5:
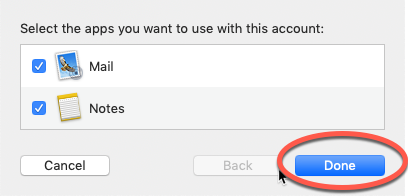
When the next box appears, click Done as shown below
 Step 6:
We now need to change some settings. Apple Mail tries to be helpful, but unfortuantely it will not detect the settings properly so we need to change them.
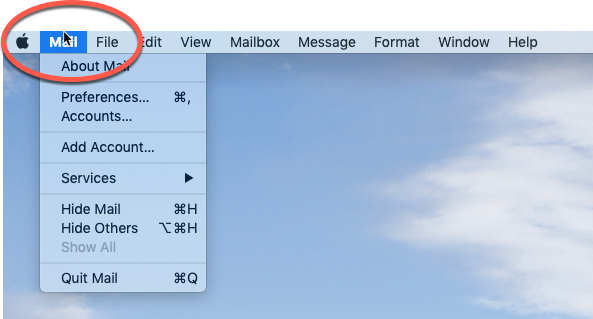
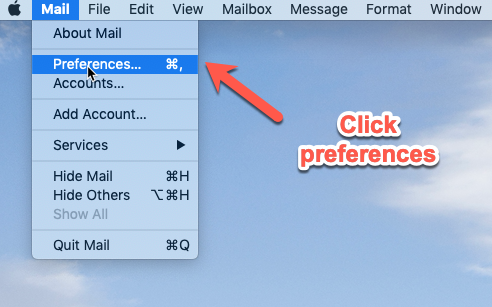
With mail still running click Mail in the top menu bar
 Step 7:
Click preferences
 Step 8:
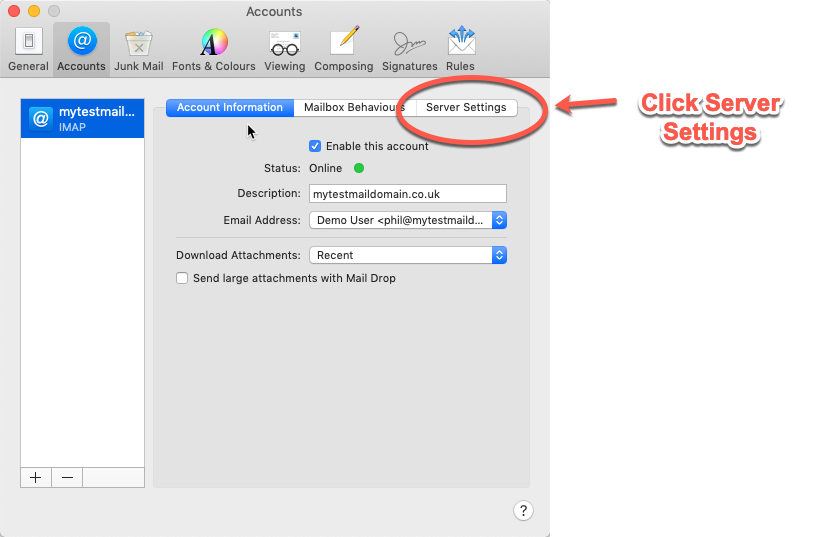
Click Server Settings
 Step 9:
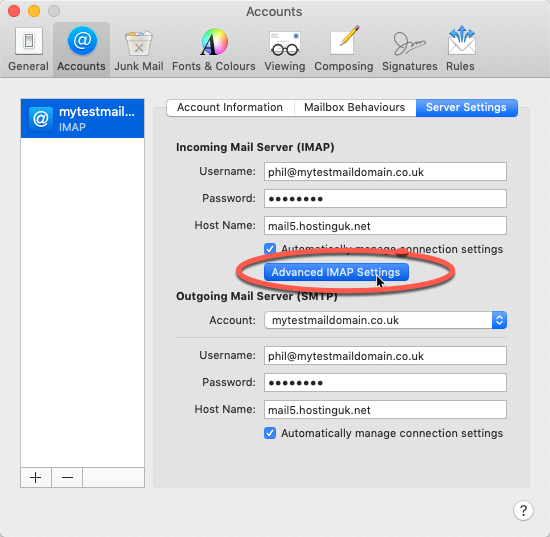
Click the Advanced IMAP Settings button as shown below
 Step 10:
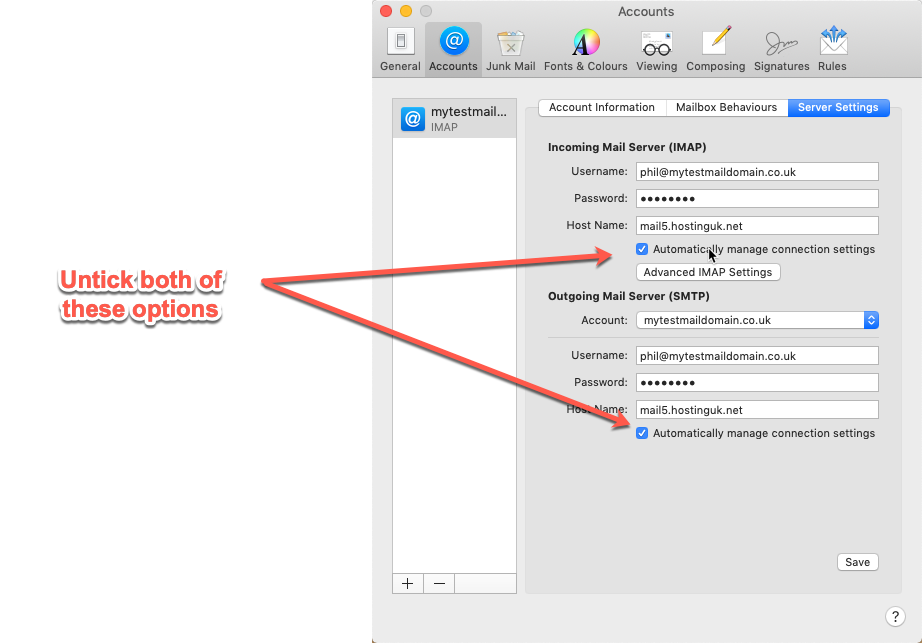
Some additional options will now be displayed.
As shown in the picture below, untick both of the options below
 Step 11:
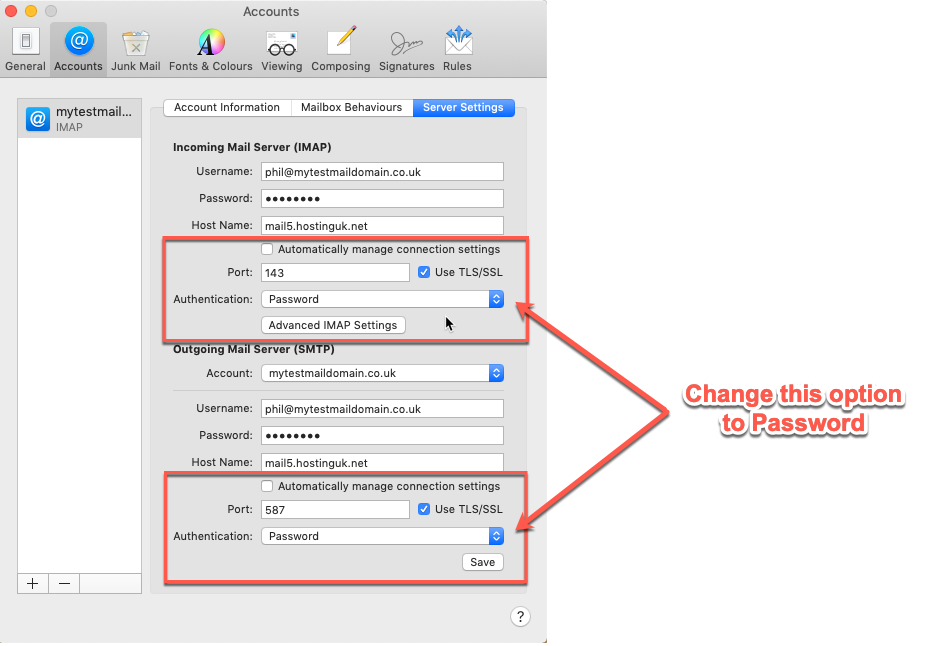
Now change both of the Authentication options shown to PASSWORD as shown in the picture below.
 Step 12:
Verify the options now look like this:
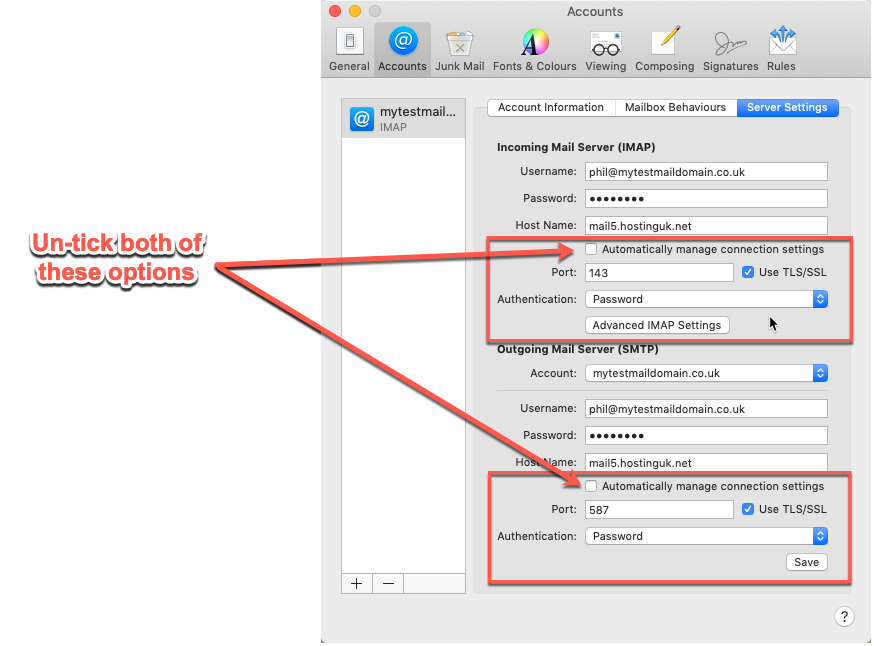
If they do click the button marked SAVE.
That's it. Your new mail account is ready to use.