When you sign up for a Standard Mail account your mail account details will be sent to you via email.
The account details that are sent our contain your administrative account and also details of the server you should use to send and receive email, and also what address to use for webmail. The Webmail interface is also the same place where you can create new mail accounts/mailboxes.
As the first account created is an administrative account it does not normally have a friendly name that you would use as a mailbox, so your first step will be to create the mail accounts you do wish to use.
In the example below, we've signed up for a new Standard Mail account using the domain name "mytestmaildomain.co.uk". Of course your domain name will be different so substitute this for your chosen domain.
We're going to log in and create a mail account for Phil, so our new mailbox will be phil@mytestmaildomain.co.uk when we are finished.
Step 1:First locate the email we sent out with your account details. This will have been sent to the same email address used to purchase the service from Hosting UK.
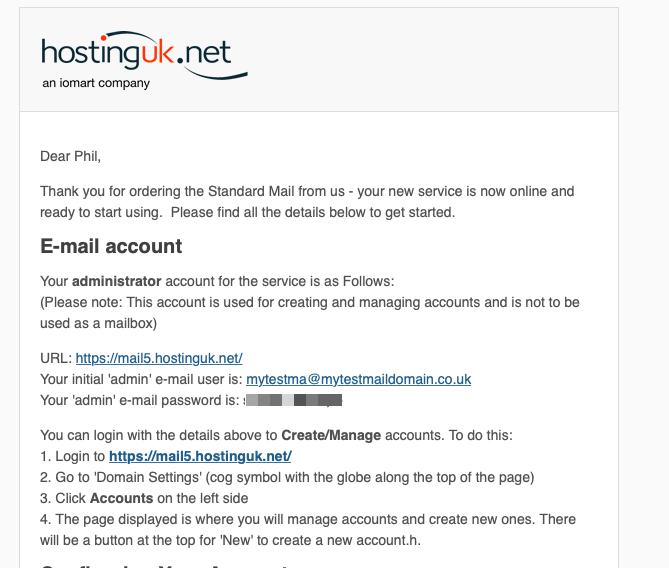
Note in the email it provides the webmail address, which in the picture shown is
https://mail5.hostinguk.net together with the admin email address and password. Again, your details may be different so use the details supplied to you in your email.
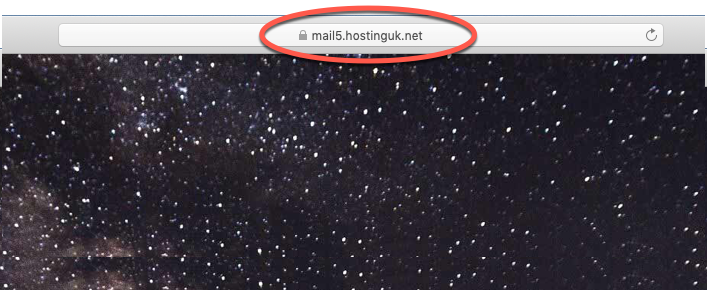
Step 2:Now that you have the webmail address, start your web browser and in the address bar, enter that address.
 Step 3:
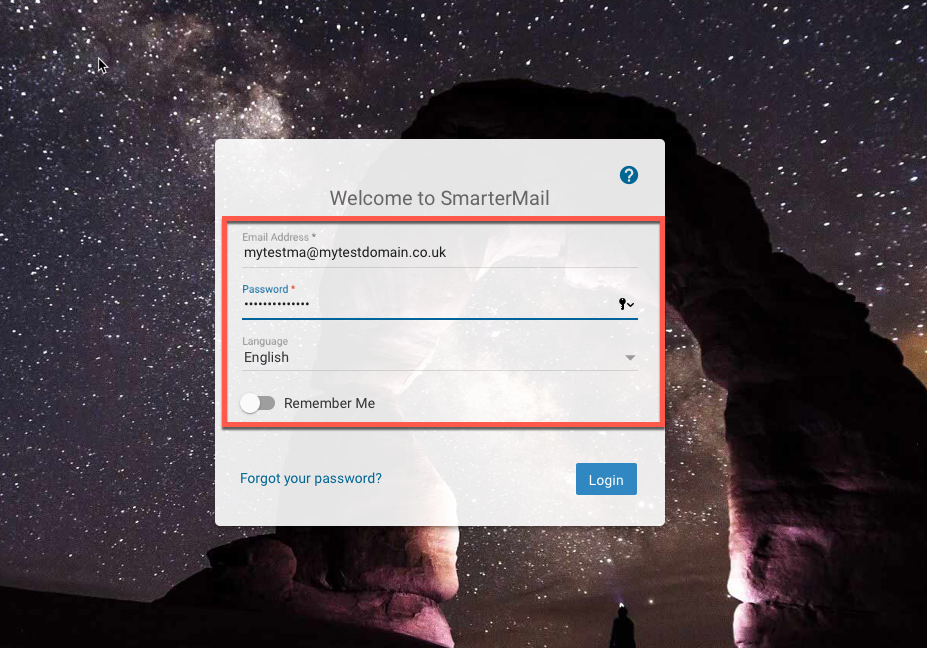
When the page loads, enter the admin email address and password in the login box, and press the Login Button.
 Step 4:
As you log in you'll be prompted to choose a theme and also for your location settings. In this case we're in the UK so we've chosen UTC as the timezone, United Kingdom as the country.
Note that in figure 3 below we've set a recovery email address. This can be used to send a password to you if you forget it.
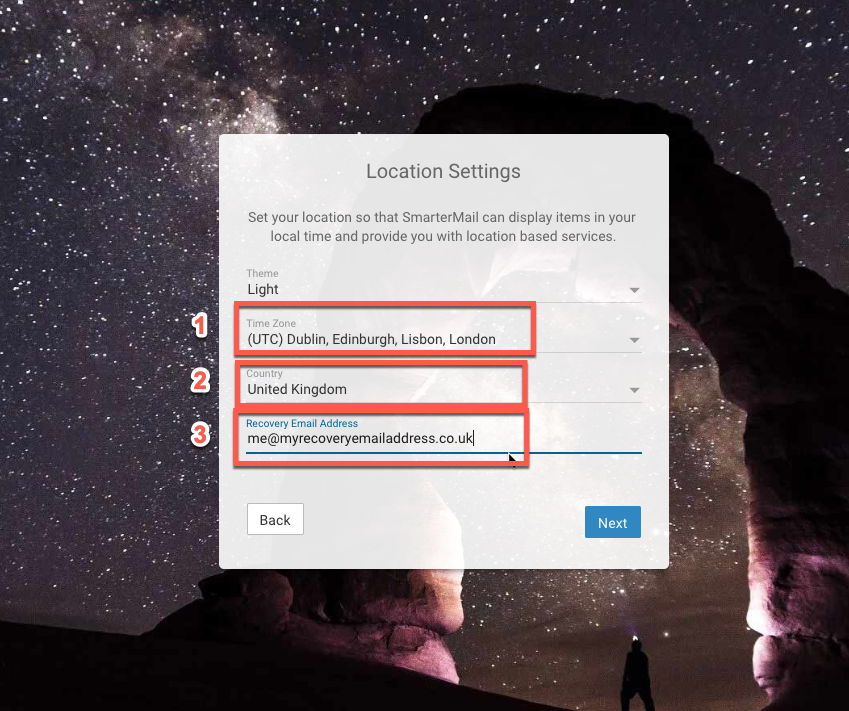
Once you entered/selected the required information in steps 1 to 3 above, click Next.
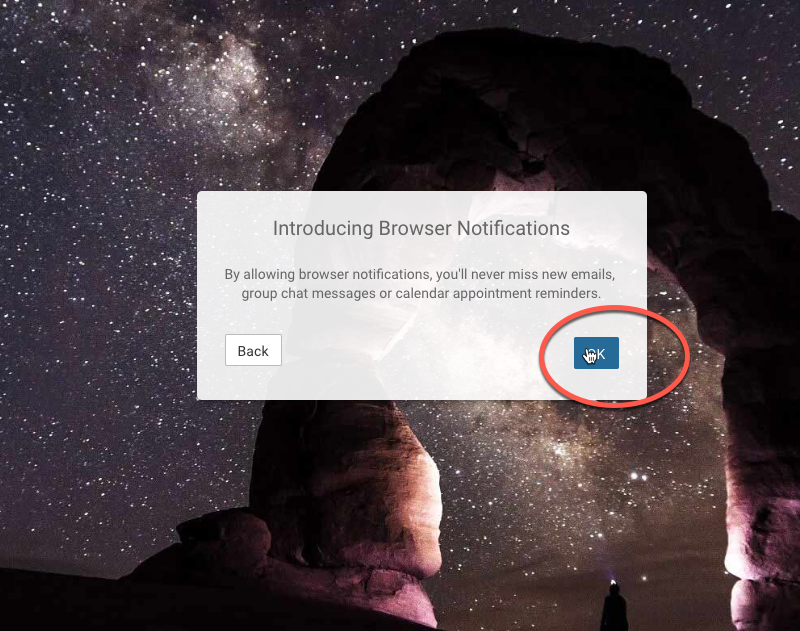
Step 5:You'll be prompted to use enable Browser Notifications. AS this isn't an option, just click OK
 Step 6:
You'll now be logged in. If you like you can take a few minutes to look around.
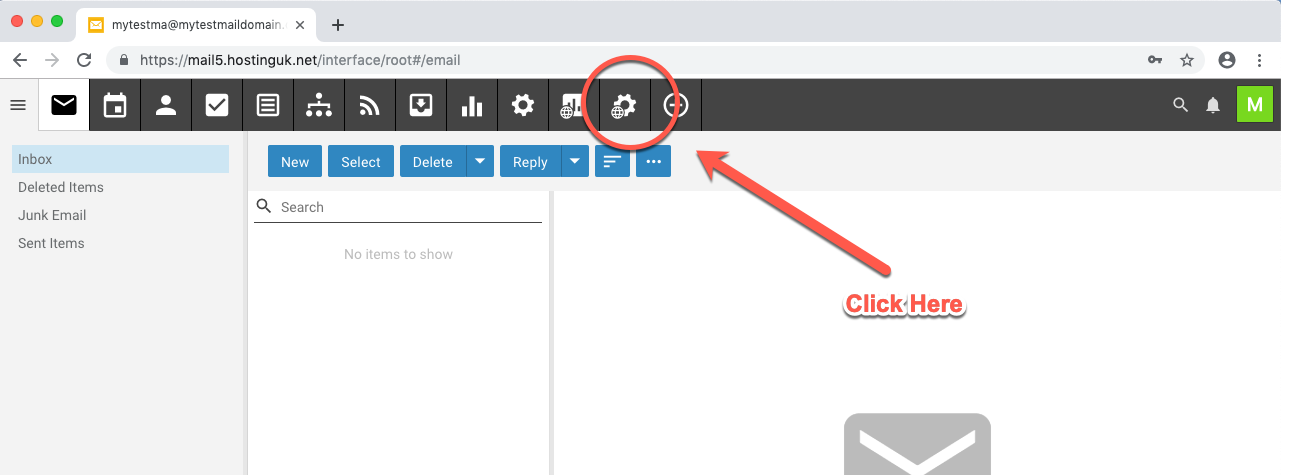
To create the new mail account, click the Cog icon as shown in the picture below
 Step 7:
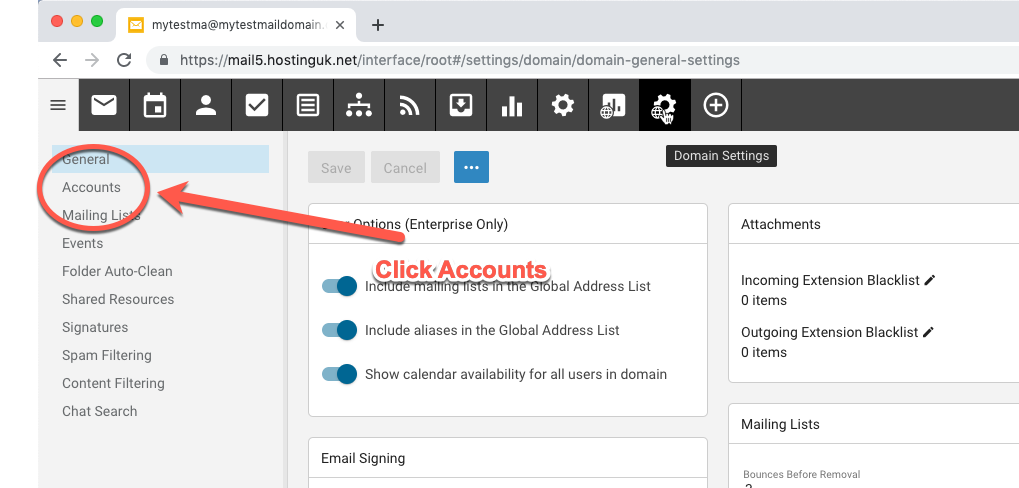
On the page that appears, click Accounts as shown below
 Step 8:
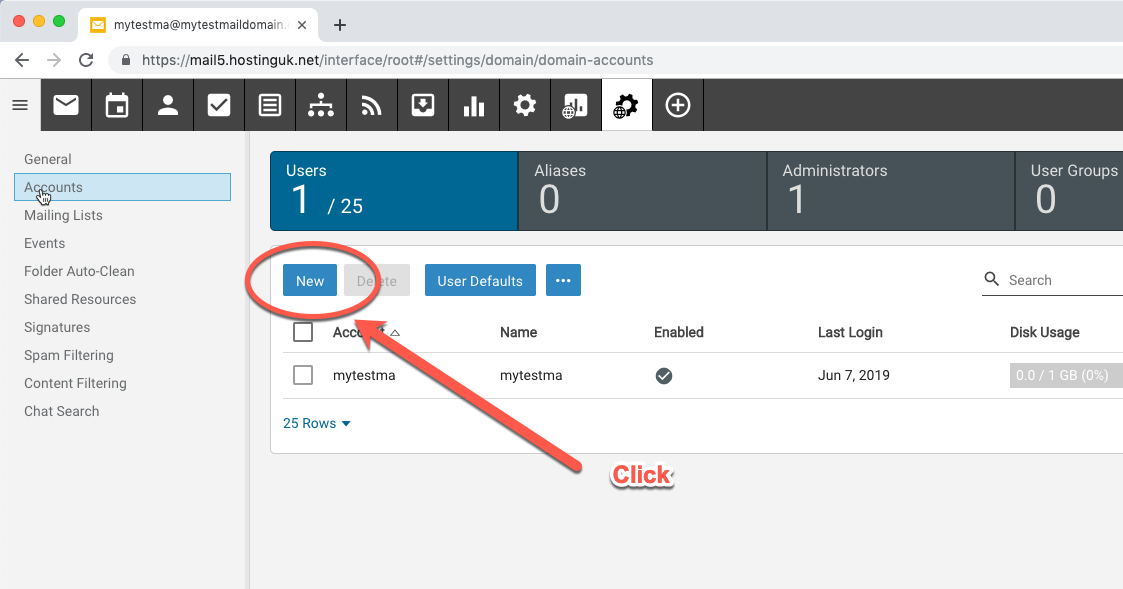
The page that appears next shows each of the accounts you have created. As this is your first time logging in you will just see the administrative account listed so click the New button as shown below
 Step 9:
A box will now pop up where you'll need to enter the details for the new account/mailbox you are creating. In this case we are creating phil@mytestmaildomain.co.uk.
As shows in the picture below, enter the username - the part before the @ symbol - in the username field as show in figure 1.
Enter a password as shown in figure 2, and repeat the password as shown in figure 3.
Note that the password needs to be a secure complex password. If the password does not meet the required standard this will be shown.
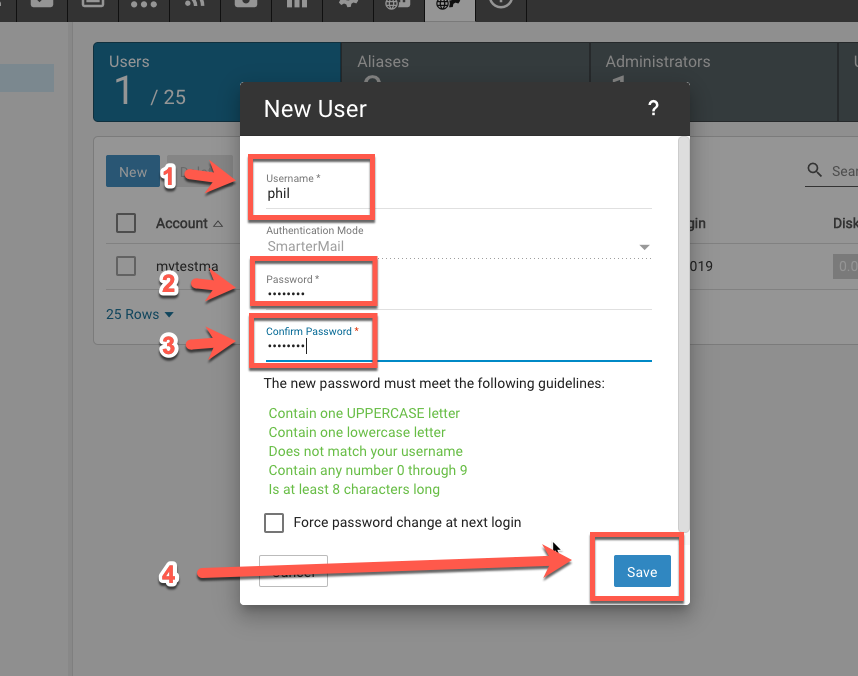
You'll note that you can force a password change for your user at next login, but as we are not going to in this example, just click
save as shown in figure 4 above.
Step 10:
That's it - your new mailbox has been created when the screen below shows. Note there are some options you can change for your user, but unless you have a reason to change them, you should just verify the default options are set as highlighted below.
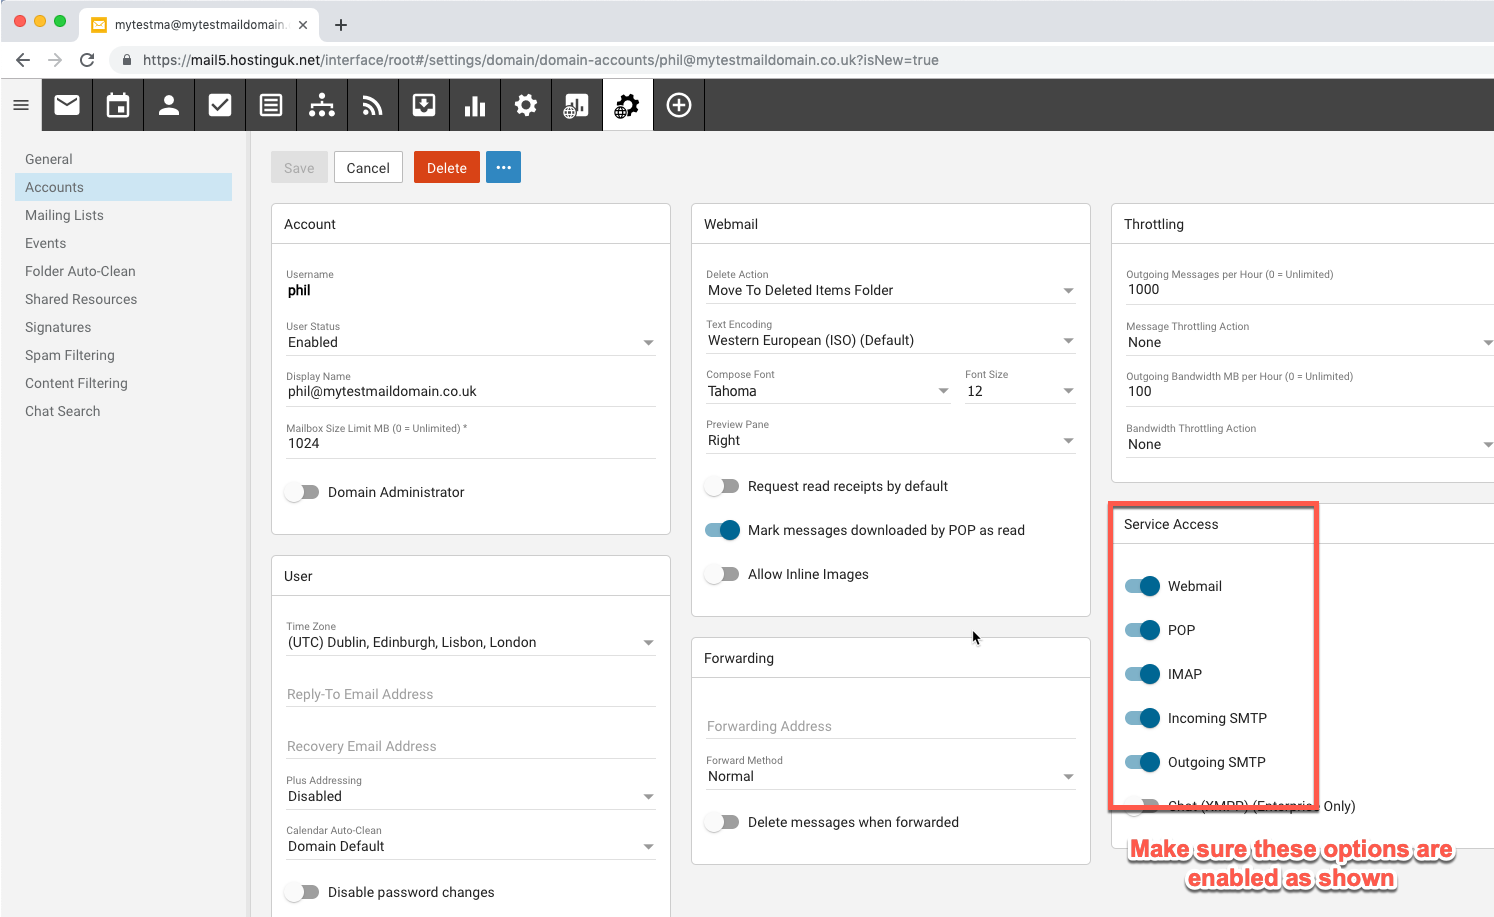
Once you have verified these settings are enabled, which they should be as standard, you can exit the web site. Your mailbox has now been created.
You can now log off.
Your new email account is now ready to send and receive email, and your user can log on to the webmail interface if they wish, using the mail address created and the password you entered.