If you have a dedicated server or VPS with R1 Backup storage, you can login to the R1 Server to manage backups and perform restores yourself. If you have R1 but do not have a login, you can request one from Support by raising a ticket in your control panel.
- With your R1 Login details, browse to your r1 server, (e.g. https://r1customer7.hostinguk.net/) where you should see a page like this
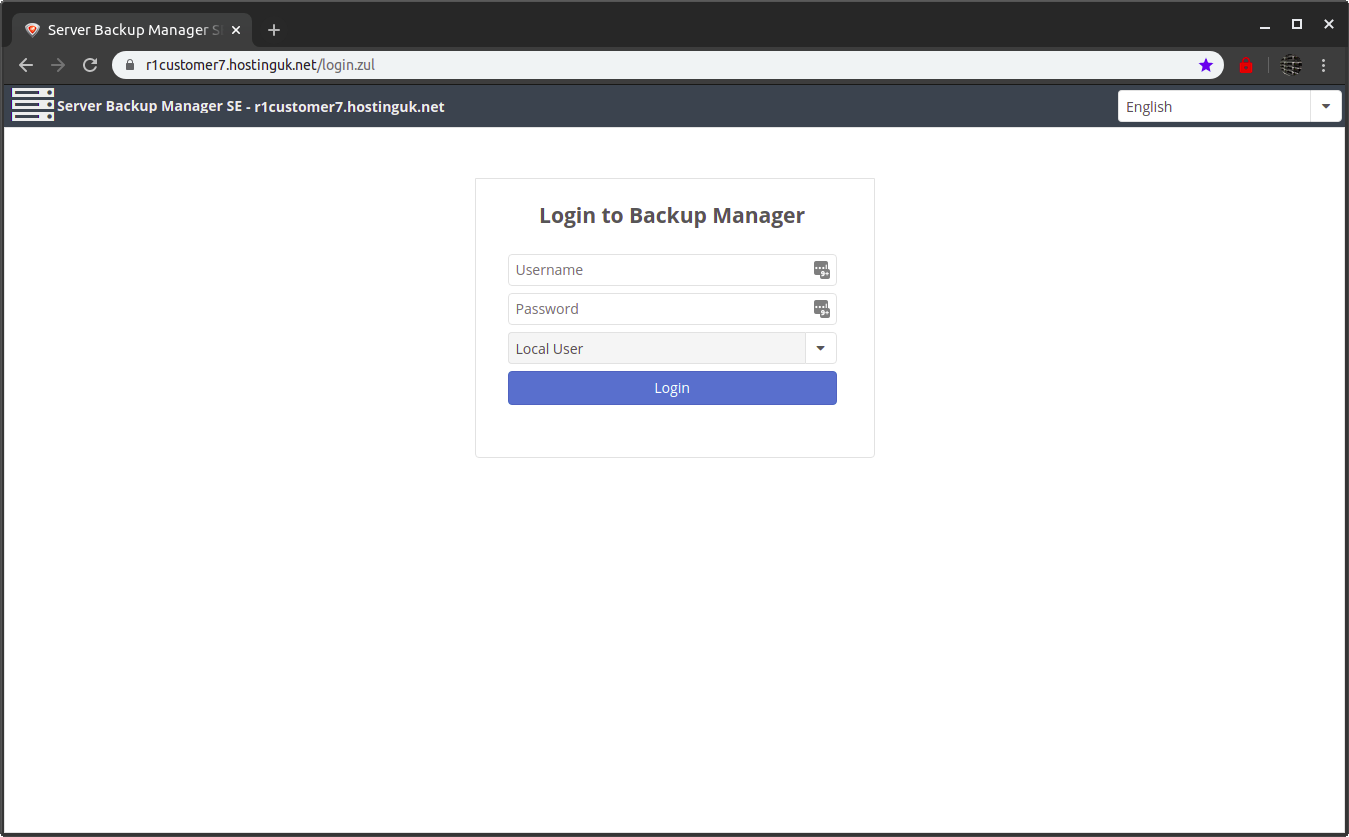
- Login with your username and password. If you have a third option for a drop down, make sure this is set to Local User
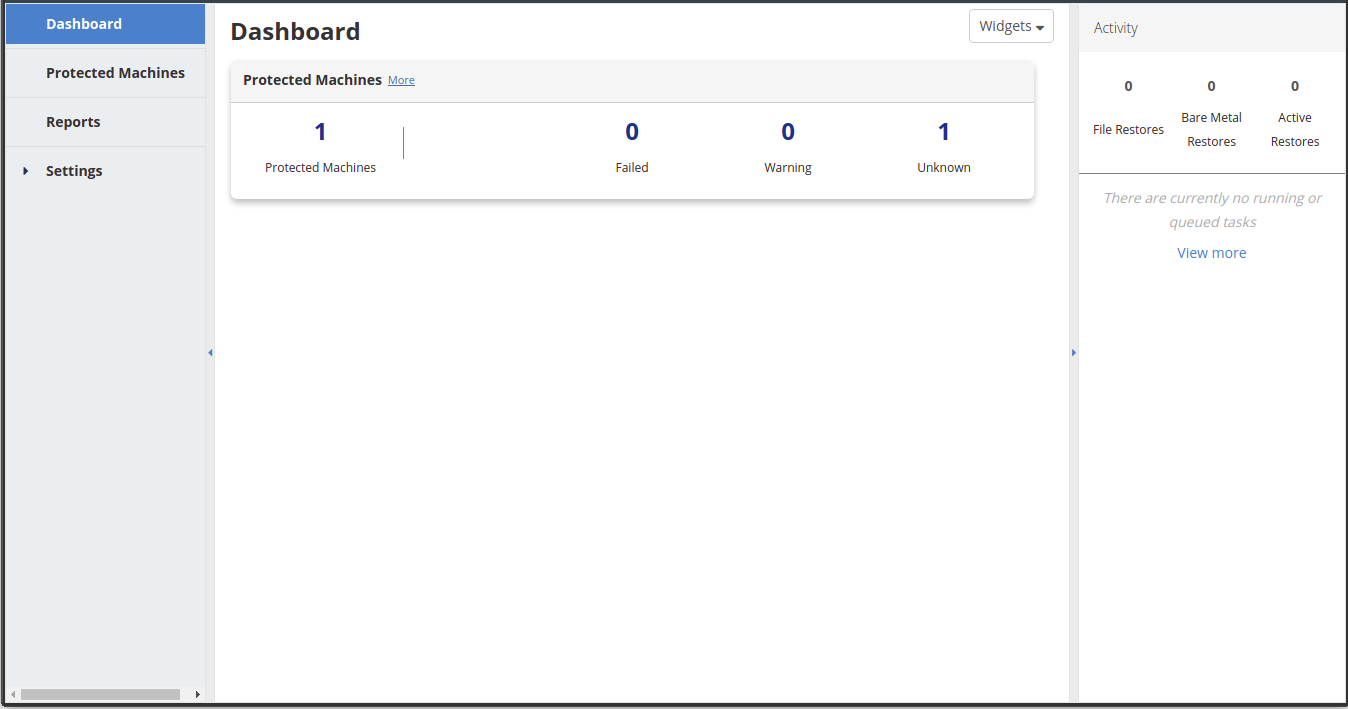
- Once logged in, you should see a Page with your Protected machines click this to view your servers:
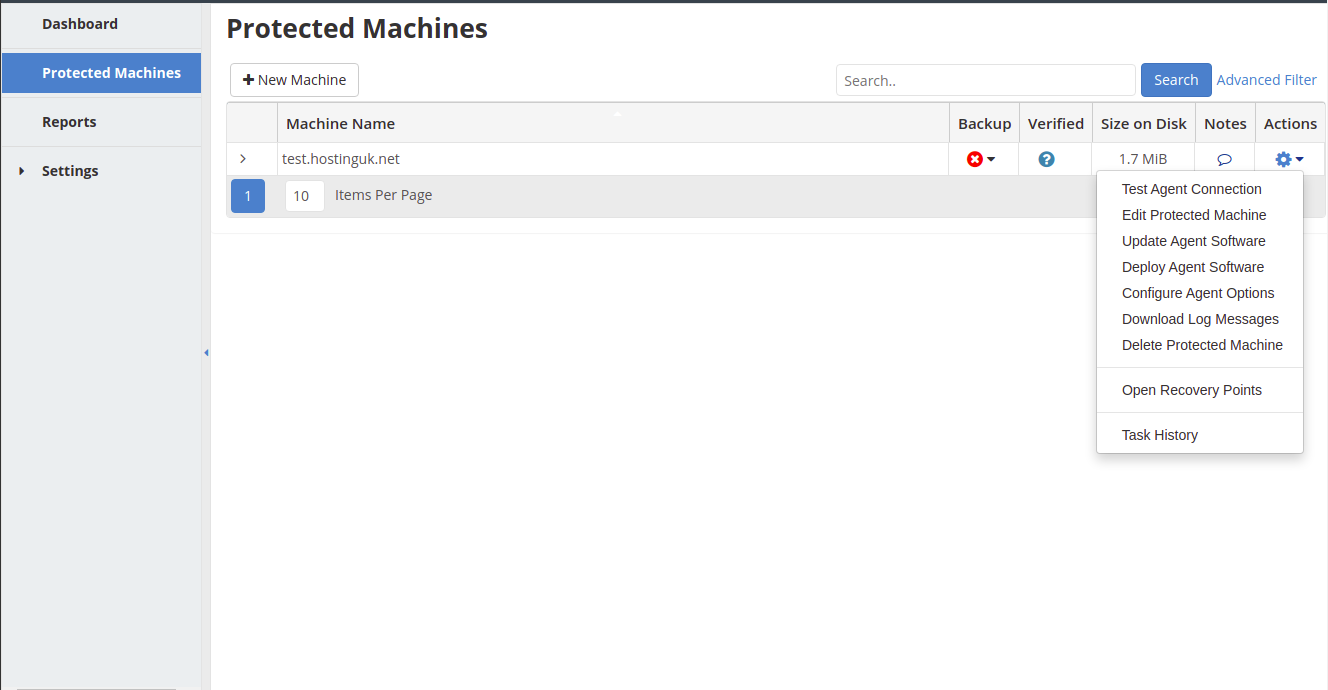
- In your List of Servers you can see the name of the server, if the last backup was ok, if it was a verified backup and how much space your backups are using.
Click the Actions 'cog' symbol to bring up options. The main options you'll generally need are:
Test Agent Connection - To test that the backup server can connect to the backup agent (primarily for troubleshooting)
Open Recovery Points - To view your backup points to start a restore from a specific date/time.
Task History - See what has been running, how long a task has been running for and if it was successful.
- If you click on Open Recovery Points you can see all of your previous backups
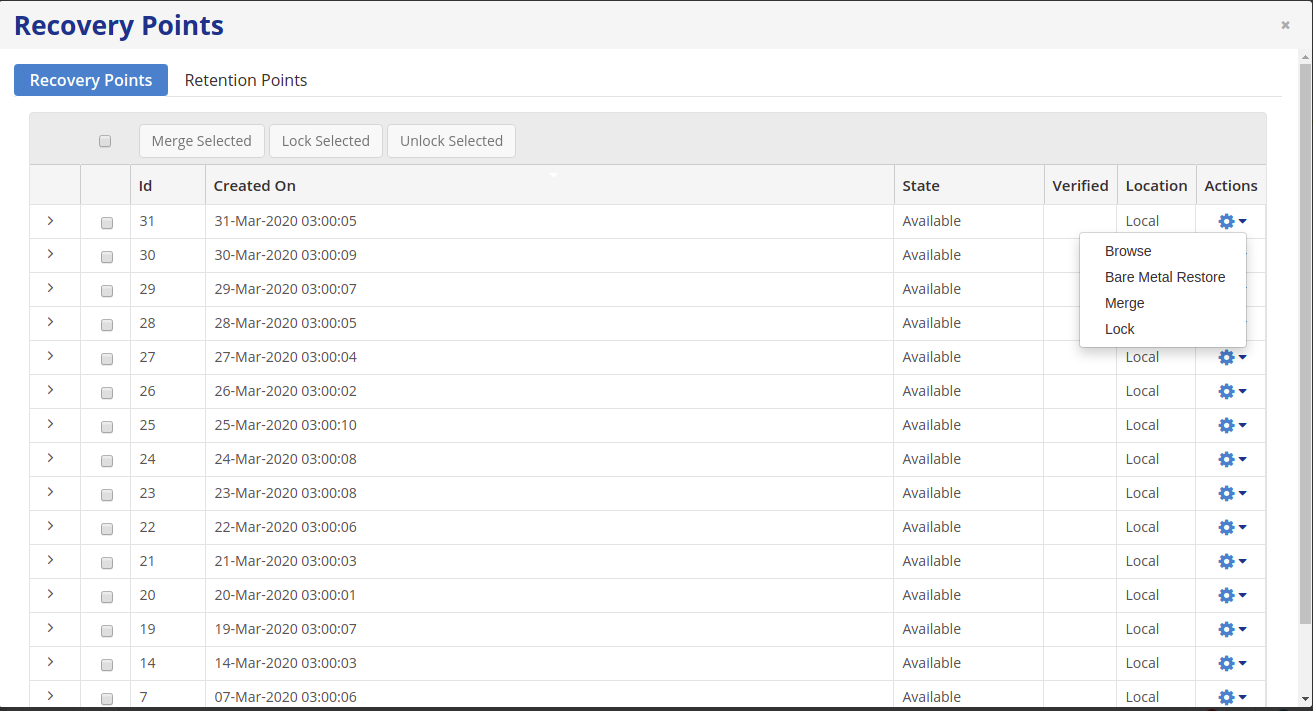
If you click the action Icon next to a backup point you will get a list of option such as:
Browse - Browse the files from this backup point. If you wish to restore individual files and folder, this is what you will need.
Bare Metal Restore - This performs a full server restore. This does require the server to be booted into a a bootable R1 image, so you will need help from support if you needed to perform this.
Merge - To merge a backup point with another to reduce usage.
Lock - To lock a backup in place. This won't be deleted and will remain on the backup server until it is unlocked.
- If you click Browse this will show you a full folder view of the server. You can browse this like any file manager, much like the one on your computer. There is also a Location bar at the top where you can set the full path of the folder you want to go to which may save time if you know where you need to be.
- You can select a file or folder which will bring up 2 options. Restore Selected will bring up the restore window which we will go over next. Download selected will download a compressed file to your local computer.

- If you need to use Restore Selected, you will get a window like the following:
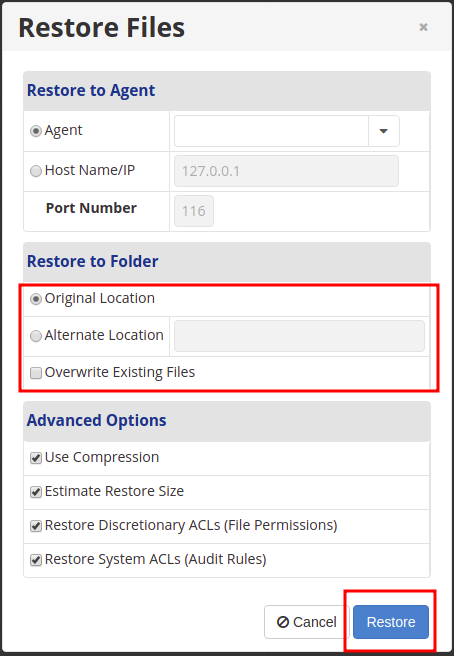
The
Restore to Folder section will allow you to either restore to the same folder the backup was take from or to restore for a new location (handy if you need to compare files).
If you are restoring over an existing file, this is also where you will get the option to
Overwrite Existing Files (It's important to make sure you do want to overwrite the file before performing this action).
Once your options are set, click the
Restore Button to start a restore.
For any further questions or help, please contact support.